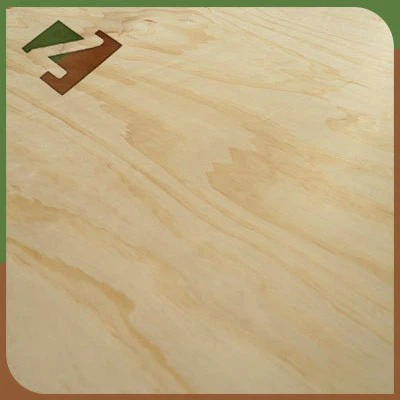
Hey there! As a plywood supplier, I get asked a lot about how to stain plywood. It's a great way to enhance the natural beauty of the wood, protect it from the elements, and give it a custom look. In this blog, I'm gonna share some tips and tricks on how to stain plywood like a pro.
Getting Started: What You Need
Before you start staining, you'll need to gather a few supplies. Here's a basic list of what you'll need:
- Plywood: You can choose from different types, like Pine CDX Grade Plywood, Okoume Veneer Face Plywood, or Warm White Melamine Plywood.
- Stain: There are different types of stains, such as oil-based, water-based, and gel stains. Each type has its own pros and cons, so choose one that suits your needs and preferences.
- Brushes: Get a few different sizes of brushes for applying the stain. A small brush is good for edges and corners, while a larger brush is better for covering large areas.
- Sandpaper: You'll need sandpaper to smooth the surface of the plywood before staining. Start with a coarse grit sandpaper (around 80 grit) and then move to a finer grit (around 120-150 grit).
- Rags: Use clean rags for wiping off excess stain and for applying a sealer later on.
- Drop cloths: Protect your work area by laying down drop cloths to catch any spills or drips.
Preparing the Plywood
The first step in staining plywood is to prepare the surface. This is crucial because a smooth, clean surface will allow the stain to penetrate evenly and give you a better finish.
- Sand the Plywood: Start by sanding the plywood with the coarse grit sandpaper to remove any rough spots, splinters, or factory finishes. Sand in the direction of the wood grain to avoid scratches. After that, switch to the finer grit sandpaper to smooth the surface even more. Wipe the plywood with a clean, dry cloth to remove any dust.
- Fill Any Holes or Gaps: If your plywood has any holes or gaps, you can fill them with wood filler. Apply the filler with a putty knife and let it dry according to the manufacturer's instructions. Once dry, sand the filled areas smooth.
- Clean the Plywood: Before staining, it's important to make sure the plywood is clean. You can use a mild soap and water solution to clean the surface, then rinse it thoroughly and let it dry completely.
Applying the Stain
Now that your plywood is ready, it's time to apply the stain. Here's how to do it:


- Test the Stain: Before applying the stain to the entire piece of plywood, test it on a small, inconspicuous area. This will help you see how the stain looks on the wood and make sure you like the color. Let the test area dry completely before deciding if you want to proceed with the same stain.
- Stir the Stain: Stir the stain well before using it to make sure the color is evenly distributed. If it's a thick stain, you might need to thin it according to the manufacturer's instructions to make it easier to apply.
- Apply the Stain: Dip your brush into the stain, then wipe off any excess on the edge of the container. Start applying the stain in the direction of the wood grain, working in small sections at a time. Make sure to cover the entire surface evenly, including the edges. Don't be afraid to apply a little pressure to get the stain into the wood pores.
- Wipe off Excess Stain: After applying the stain, wait a few minutes and then wipe off any excess stain with a clean rag. This will help prevent a blotchy or sticky finish. If you're looking for a darker color, you can let the stain sit longer before wiping it off.
- Let the Stain Dry: Let the first coat of stain dry completely before applying a second coat. The drying time can vary depending on the type of stain and the humidity, but it usually takes a few hours to overnight.
Applying Additional Coats
For a deeper, richer color, you can apply a second or even a third coat of stain. The process is the same as applying the first coat, but make sure to sand the surface lightly with a fine grit sandpaper between coats to remove any bumps or raised grain. This will help the next coat of stain adhere better.
Sealing the Stained Plywood
Once the stain is dry and you're happy with the color, it's time to seal the plywood to protect the stain and the wood. You can use a clear sealer, such as a polyurethane or a varnish. Here's how to apply the sealer:
- Choose the Right Sealer: There are different types of sealers available, so choose one that's compatible with the type of stain you used. For example, if you used an oil-based stain, you'll want to use an oil-based sealer.
- Apply the Sealer: Use a brush or a roller to apply the sealer in the direction of the wood grain. Make sure to cover the entire surface evenly, including the edges. Apply the sealer in thin, even coats, and let each coat dry completely before applying the next one.
- Sand Between Coats: Just like with the stain, sand the surface lightly with a fine grit sandpaper between coats of sealer to smooth the surface and help the next coat adhere better.
- Let the Sealer Cure: After the final coat of sealer is applied, let it cure for at least 24 hours before using the plywood. This will allow the sealer to fully harden and provide the best protection.
Tips and Tricks
- Work in a Well-Ventilated Area: Staining and sealing plywood can produce fumes, so make sure you work in a well-ventilated area to avoid inhaling them.
- Protect Your Hands and Clothing: Wear gloves to protect your hands from the stain and sealer, and wear old clothing that you don't mind getting stained.
- Use a Drop Cloth: As mentioned earlier, use a drop cloth to protect your work area from spills and drips.
- Don't Rush the Process: Take your time and follow the steps carefully to ensure a good finish. Rushing the process can lead to a messy or uneven finish.
- Experiment with Different Stains and Finishes: There are many different types of stains and finishes available, so don't be afraid to experiment to find the look you like best.
Conclusion
Staining plywood is a great way to add beauty and protection to your wood projects. By following these steps and tips, you can stain plywood like a pro and achieve a beautiful, long-lasting finish. If you're in the market for plywood, we've got a wide selection of high-quality products, including Pine CDX Grade Plywood, Okoume Veneer Face Plywood, and Warm White Melamine Plywood. If you have any questions or want to discuss your plywood needs, feel free to reach out. We're here to help you with all your plywood requirements.
References
- Wood Finishing Basics: A Guide to Staining and Sealing Wood.
- Plywood Manufacturer's Instructions for Staining and Finishing.