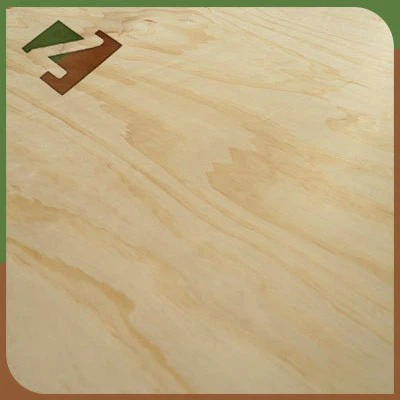
How to install Pine CDX Grade Plywood?
As a supplier of Pine CDX Grade Plywood, I've witnessed firsthand the versatility and durability this product brings to various construction and woodworking projects. In this blog, I'll guide you through the process of installing Pine CDX Grade Plywood, ensuring you achieve a professional and long - lasting result.
Preparation
Before you start the installation process, it's crucial to prepare properly. First, measure the area where you plan to install the plywood. This step will help you determine the number of sheets you need. Make sure to account for any cuts or waste that may occur during the installation.
Inspect the plywood sheets for any defects such as knots, splits, or warping. While Pine CDX Grade Plywood is generally of good quality, it's still possible to have some minor imperfections. If you find any significant issues, set those sheets aside and contact your supplier for a replacement. You can find high - quality Pine CDX Grade Plywood from us, and we ensure strict quality control.
Gather all the necessary tools. You'll need a circular saw or a handsaw for cutting the plywood, a drill with appropriate bits for fastening, a tape measure, a carpenter's square for ensuring right angles, a hammer, nails or screws, and safety equipment such as safety glasses and gloves.
Cutting the Plywood
Once you have your measurements, mark the cutting lines on the plywood using a straightedge and a pencil. If you're using a circular saw, set the blade depth to slightly deeper than the thickness of the plywood. This will ensure a clean cut.
When cutting, make sure to support the plywood properly. If the sheet is large, have an assistant help you hold it steady. Make slow and steady cuts, following the marked lines precisely. If you're making curved cuts, a jigsaw might be a better option.
After cutting, sand the edges of the plywood to smooth out any rough spots. This will not only make the installation easier but also give a more finished look to your project.
Surface Preparation
The surface where you'll be installing the Pine CDX Grade Plywood needs to be clean, dry, and level. If it's a floor, remove any old flooring materials, dirt, or debris. If it's a wall, check for any bumps or unevenness and sand them down.
If you're installing the plywood on a wooden surface, you can apply a primer or a sealant to prevent moisture from seeping in and causing damage over time. This is especially important in areas prone to high humidity or moisture, such as basements or bathrooms.
Installation on Floors
If you're installing Pine CDX Grade Plywood on a floor, start by laying the first sheet in one corner of the room. Use a carpenter's square to ensure that the sheet is at a right angle to the walls. Leave a small gap (about 1/8 inch) between the edge of the plywood and the wall to allow for expansion.
Fasten the plywood to the subfloor using nails or screws. For nails, use 8d or 10d common nails, spaced about 6 inches apart along the edges and 12 inches apart in the field of the sheet. If you're using screws, choose screws that are long enough to penetrate the subfloor by at least 1 - 1/2 inches.
As you lay subsequent sheets, stagger the joints to create a stronger and more stable floor. Make sure the edges of the sheets fit tightly together, but don't force them so much that they warp.
Installation on Walls
When installing Pine CDX Grade Plywood on walls, start at the bottom and work your way up. Mark the studs on the wall using a stud finder. The plywood should be fastened to the studs for maximum support.
Hold the first sheet of plywood against the wall, aligning it with the bottom and one side of the wall. Use a level to ensure that the sheet is straight. Fasten the plywood to the studs using nails or screws, following the same spacing guidelines as for floor installation.
If you're covering a large wall area, you may need to join multiple sheets together. Use a tongue - and - groove joint or a butt joint with a backing strip for a more seamless look. Make sure to caulk any gaps between the sheets and the wall to prevent air and moisture infiltration.
Finishing Touches
After the Pine CDX Grade Plywood is installed, you can finish it according to your needs. If it's a floor, you can sand it smooth and apply a floor finish such as polyurethane for protection and a nice appearance. If it's a wall, you can paint it, wallpaper it, or leave it natural for a rustic look.
You can also use Pine CDX Grade Plywood in furniture making. Pine Plywood for Furniture offers a great alternative for creating custom - made pieces. And if you're looking for a different type of plywood, our Bleached Poplar Plywood is also a popular choice.


Conclusion
Installing Pine CDX Grade Plywood is a manageable project with the right preparation and tools. Whether you're working on a floor, a wall, or a furniture piece, following these steps will help you achieve a successful installation.
If you're interested in purchasing Pine CDX Grade Plywood or have any questions about the installation process, feel free to reach out to us. We're here to provide you with high - quality products and professional advice. Our team of experts can assist you in choosing the right type of plywood for your project and offer guidance throughout the installation process. Contact us today to start your next project with confidence.
References
- Wood Handbook: Wood as an Engineering Material, USDA Forest Service
- Construction Carpentry textbooks, various publishers